Creating a custom exporter is just like writing a function, with a few small differences:
- Exporters don’t run on any change to your workflow — they only run on-demand when a user clicks a download / export button.
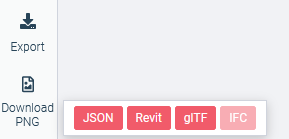
- Exporters don’t show up in the Workflow panel. They show up as buttons when you click the Export button:

- Exporters cannot add anything to the Model, such as adding new elements or geometry.
How to create an exporter
- Create a new function with
hypar new— just like any other C# function.
- Open
hypar.jsonand edit the$schemaproperty of the function to behttps://prod-api.hypar.io/schemas/ExporterFunction:
json{
  "$schema": "https://prod-api.hypar.io/schemas/ExporterFunction",
  "id": "[SOME_GUID_HERE]",
  "name": "STL Export",
  ...
}
- Make sure to add
model_dependenciesto your function, which specify the models your exporter needs access to. In this example, the exporter creates an STL file fromLocationandEnvelope, both optionally:
json"model_dependencies": [
    {
      "name": "location",
      "optional": true
    },
    {
      "name": "Envelope",
      "optional": true
    }
  ],
- Your exporter may export one or more file types. For each type of file you want to make available for export, add a
FileDestinationinput toinput_schema, like so.
The
$hyparFileExtension value is required — without this the exporter will fail!json"input_schema": { "type": "object", "properties": { "Download STL": { "$ref": "https://schemas.hypar.io/FileDestination.json", "$hyparFileExtension": "stl" }, "Download Text Report": { "$ref": "https://schemas.hypar.io/FileDestination.json", "$hyparFileExtension": "txt" } } },
You may also add regular inputs to the
input_schema, like number or text fields, if you need to supply configurable settings for your exporter. - Run
hypar initto update the generated code for your function.
- In your function code, create the file you want the user to download. You will use the
FileDestinationobject to pass a file back out to the user. Here are a few examples:
Simple text export
c#var txtDestination = input.DownloadTextReport; // grab the destination
string myTextFileContents = "Hello, world!";
// call SetExportTextContents to create an export text file
txtDestination.SetExportTextContents(myTextFileContents);
Read a file from disk
c#var destination = input.DownloadSTL; // grab the destination
// write to a temporary local file (see note below *)
var tempFilePath = Path.GetTempFileName();
stl.Save(tempFilePath);
// create a stream reading from the file path
var readStream = File.OpenRead(tempFilePath);
// set that stream as the export stream
destination.SetExportStream(readStream);
In any Hypar function, you’re only allowed to write files to the system
temp directory. Use Path.GetTempFileName or Path.GetTempPath.Stream directly to export
Don’t close the stream you set as the Export stream (e.g. with a
using statement) — Hypar’s API needs access to it after that, and we’ll take care of closing it for you. c#var destination = input.DownloadSTL; // grab the destination from input var stream = new MemoryStream(); // create a new stream // do something with that stream // (this example uses a library which can "Save" directly to a stream) stl.Save(stream); // call SetExportStream on the destination destination.SetExportStream(stream); // This line will not be necessary in newer versions // of the `Hypar.Functions` library. stream.Seek(0, SeekOrigin.Begin);
- Publish your function with
hypar publishto be able to use it on Hypar.
How to use an exporter
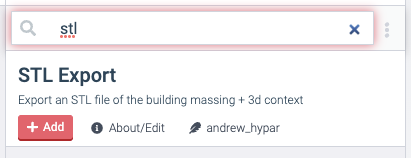
Your new exporter won’t be available in the Export menu immediately. You have to add it to the workflow, just like any other function (note: this is likely to change eventually).

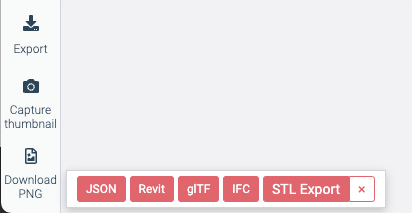
Once added, you’ll see it show up in the export menu:

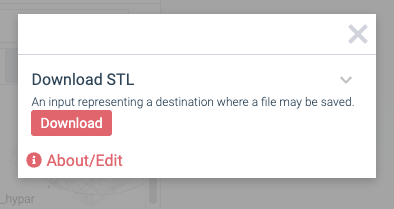
When you click the button, you’ll see the inputs/settings of your exporter, including the File Destinations as download buttons.

